How to Upload Your Html Into a File
Introduction
This article explains how to upload a file using HTML 5 and JavaScript. HTML 5 provides an input type "File" that allows us to interact with local files. The File input type tin can be very useful for taking some sample file from the user so doing some functioning on that file. Nosotros will exist using the File API in our projection, then if you lot demand any detailed description of any role then you can check that API. It likewise contains various other methods to bargain with binary files. The interfaces we will use are the FileList interface to go the listing of files, File Reader interface for reading the file, File Interface to get file attributes and so on.
Checking the support
Since HTML 5 is quite new and not all of its features are supported by all browsers, information technology'south meliorate to check whether your browser supports the file features or not. To check this, just put this piece of snippet in your HTML file and check if y'all become an warning.
<script> if (window.File && window.FileReader && window.FileList && window.Hulk) { alert(" File API supported.!"); } else { alarm('The File APIs are not fully supported in this browser.'); } </script>
If you are getting the message as shown in the following picture then y'all tin proceed in this article otherwise you need to update your browser.

File input tag
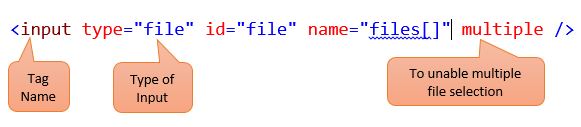
The File input tag is the aforementioned as other input tags of HTML simply the just difference is "type". For file type input we need to set the input type of an element to "file" type. Simply as in the following code snippet:
Selecting the file
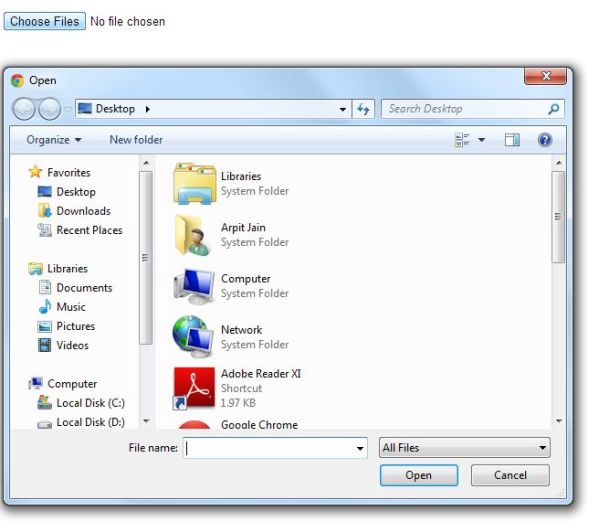
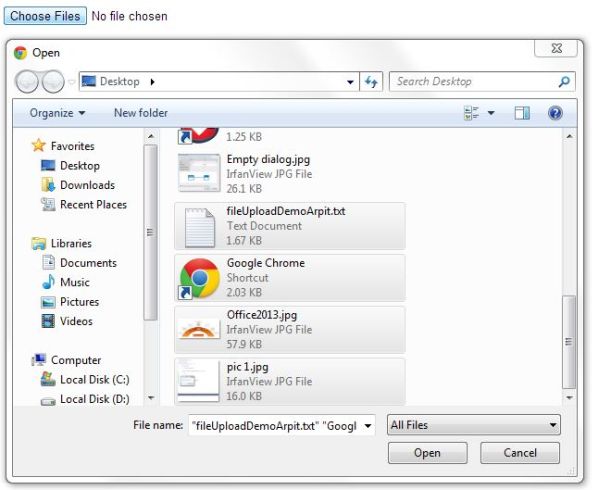
To select a file, just click on the "Choose file" button of your HTML page and select a file from open dialog. If you take enabled multiple selection and so you can select the multiple files. Check the following picture for reference.
Processing the selected file
Now we have the file selected by the user. Adjacent we will check the properties of that file. For that we will utilize the File interface. The File interface has two important attributes that are quite useful for united states. They are:
readonly attribute DOMString name; readonly attribute Engagement lastModifiedDate;
As the name of the attributesindicate, the offset ane provides the proper noun of the file and the second provides the last modified date.
To use this interface in our JavaScript (from now onwards I'll employ script only) code just use the post-obit lawmaking snippet.
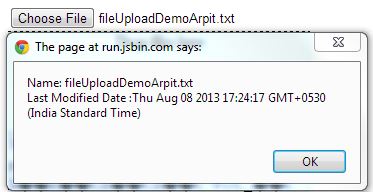
function startRead(evt) { var file = document.getElementById('file').files[0]; if (file) { alert(" Name: " + file.name + " \north" + " Last Modified Engagement :" + file.lastModifiedDate); } } Now in your HTML input tag add an onchange event and phone call this function equally in the following:
<input type=file id='file' onchange="startRead()"/>
If you lot have done everything correct and then far and so you lot volition get an output similar to this picture.
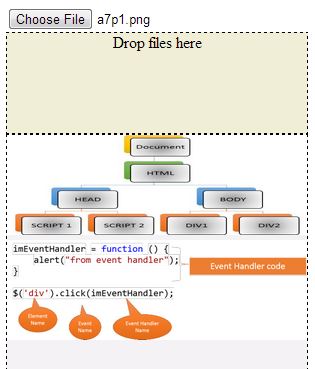
Adding drag and drop
Then far we are selecting the file by the utilize of the button but to make it more user friendly let united states add a drag and drop back up and so that the user tin can drag the file on the div to open up it., To make this functionality alive but add together the following script in your script section.
function startReadFromDrag(evt) { var file = evt.dataTransfer.files[0]; if (file) { var fileAttr = " Name: " + file.name + " \northward" + " Terminal Modified Date :" + file.lastModifiedDate; $('#draghere').text(fileAttr); alert(fileAttr); } evt.stopPropagation(); evt.preventDefault(); } var dropingDiv = document.getElementById('draghere'); dropingDiv.addEventListener('dragover', domagic, fake); dropingDiv.addEventListener('drop', startReadFromDrag, false); And too add this HTML and style code for better output:
<div id=" draghere" >Drop files here</ div > #draghere{ width:300px; height:100px; groundwork-color:rgba(221,214,155,0.4); border:1px dashed black; text-align:center; }
The code is simple. The HTML line basically provides a div for which the user can drag the file to begin an upload. In the script, what we accept done in lines xiii-15 is but grab the element so add together an outcome handler on it. Lines x and 11 stops the default behavior of the browser.
Reading the content of the file
Now for the main part, that is reading the content of the file. For that we will utilize the File Reader interface. The File Reader interface provides united states of america the post-obit methods to work with text and binary files.
void readAsArrayBuffer(Blob blob); void readAsText(Blob blob, optional DOMString encoding); void readAsDataURL(Blob hulk);
The 3rd method is used for reading the file content in the form of a Data URL. The second method is used for reading text-based files with supported encoding like UTF-viii and UTF-16. The outset method is used for reading data as an array object.
Out of all these three methods we will be using the 2d and 3rd ones.
To read the file just add together the following function script, HTML and mode in your file.
HTML
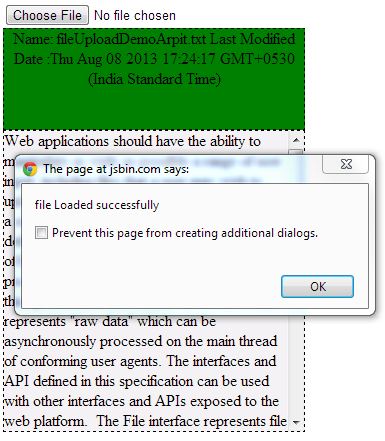
<div id=" op"></ div > Style #op{ width:300px; height:300px; overflow:car; background-color:rgba(221,214,221,0.3); edge:1px dashed blackness; } Script function getAsText(readFile) { var reader = new FileReader(); reader.readAsText(readFile, " UTF-8″); reader.onload = loaded; } function loaded(evt) { alert("File Loaded Successfully" ); var fileString = evt.target.result; $("#op" ).text(fileString); }
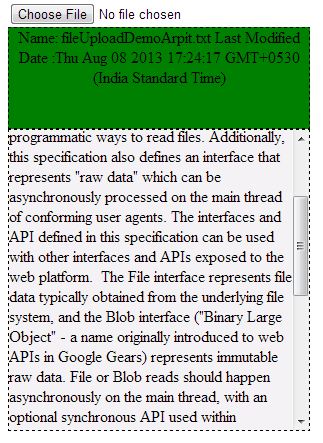
What we have washed is that nosotros accept added the div having an id op (output) on which we will prove the file text. We styled information technology a chip. In the script , part getAsText(readfile) basically creates the new FileReader object for reading the file. And then in the side by side line nosotros are using our readAsText() function to become the text from the file into the retentiveness. Information technology is an async function so we need to wait for information technology's completion before we can utilise the text. We added the onload issue on the reader object so that we become notification as shortly as the read is completed. As the read completes information technology volition call the loaded office. In the loaded office nosotros are simply showing the text of the function inside an op div. If you have washed everything right and so far so y'all are done. Check the post-obit output. Oh! I forget to mention that you need to uncomment the call of getTextFile() from all of your read functions.
Now to read an Prototype file just replace your above functions with the following code.
function startRead(evt) { var file = document.getElementById('file').files[0]; if (file) { if (file.type.friction match(" paradigm.*")) { getAsImage(file); alert(" Name: " + file.name + " \north" + " Last Modified Date :" + file.lastModifiedDate); } else { getAsText(file); alert(" Proper name: " + file.name + " \northward" + " Last Modified Appointment :" + file.lastModifiedDate); } } evt.stopPropagation(); evt.preventDefault(); } function startReadFromDrag(evt) { var file = evt.dataTransfer.files[0]; if (file) { if (file.type.friction match(" image.*")) { getAsImage(file); alarm(" Name: " + file.name + " \n" + " Last Modified Date :" + file.lastModifiedDate); } else { getAsText(file); alert(" Name: " + file.name + " \n" + " Last Modified Date :" + file.lastModifiedDate); } } evt.stopPropagation(); evt.preventDefault(); } function getAsImage(readFile) { var reader = new FileReader(); reader.readAsDataURL(readFile); reader.onload = addImg; } function addImg(imgsrc) { var img = document.createElement('img'); img.setAttribute(" src", imgsrc.target.result); document.getElementById(" op").insertBefore(img); } The code is not as large as it looks initially. It by and large contains the banality plate code with slight modifications of previous methods. The getAsImage() method basically reads the prototype equally a data URL and then sends it to "addImg()" which in turn creates a new img chemical element and appends information technology in an op div. "File.type.match" is used to identify the type of file. Check the output below for the code above.
Summary
All done. The upload completed successfully. In this article I tried my best to provide you lot the minimal lawmaking required for the proper working of the uploader only you always can have a look at the API for other options available for it. If you detect any problem and then ask in annotate. You lot can check the Demo HERE .
Source: https://www.codeproject.com/Articles/664032/Creating-a-File-Uploader-Using-JavaScript-and-HTML
0 Response to "How to Upload Your Html Into a File"
Mag-post ng isang Komento